Monday, December 8, 2014

Dag 6 Kerst inspiratie/ Day 6 Christmas inspiration


Ik heb en bijzonder druk weekend achter de rug
en dus een paar super gemakkelijke kaarten.
Design papier en een pons doet wonderen.
Sorry dat deze punch niet uit de recente 
catalogus is. Je kan ook een ronde punch nemen
of een andere die jij wel hebt.

I had a very busy weekend,
so today i need some super easy cards.
Design paper and a punch makes life so easy.
Sorry about the punch not being from this cataloge,
but you can also use a circle punch or one that
you have yourselve.


Je kan een effe achtergrond nemen en dan
de ballen uit design papier of
je neemt het design papier als achtergrond
en effen kerstbal. Een lintje of washi tape
om de bal aan te hangen, een strikje om de
bal en eventueel wat glimmende steentjes.

De tekst is van de stempel set Sassy Salutations.

You can use a plain background and punch the baubles
out of the design paper or you take the
design paper as the background and make plain baubles.
A ribbon or some washitape to hang the baubles from.
A ribbon around the baubles and some rhinestones.

The sentiment is from the Sassy Salutations set.


onafhankelijk Stampin'Up! demonstratrice


Friday, December 5, 2014

Day 5 Kerst inspiratie/Day 5 Christmas inspiration

Cadeau kaart/Gift card
Ja,soms weet je het even niet meer. Wat nu te geven
en dan is zo'n kaartje met geld erop een goed idee,
maar dan wel leuk verpakt!

Yeah,sometimes you don't know what to give and are
those gift cards a wonderful alternative,
but only when wrapped nicely.

Ik heb deze kaart geaakt met de Top Note die.
Je snijd hem hiervoor 2x uit cardstock en
2x uit design papier. Ik heb een velletje uit
TrimThe Tree designer series paper stack
(zo leuk dat het aan twee kanten te gebruiken is!).

I made this gift card with the Top Note die. You cut out
2 pieces of cardstock and 2 pieces of Trim the Tree designers
paper from the stack. So much fun to be able
to use both sides of the paper.
Zo ziet het er dan uit. Plak het ene velletje op
de voorkant en decoreer naar eigen idee.
Ik heb de boom van de set Lovely as a Tree
gebruikt en de tekst is van Work of Art.

Adding the paper and it looks like this. Glue the full
pece to the front and the half piece inside only
on 3 sides. Stamp the tree of Lovely as a Tree set
on the front and use the sentiment of Work of Art.

Maar ja denk je......ik heb die Top Note die niet
en ik vindt het wel een leuk idee. Nou dat kan ook hoor.
Gewoon wat recht papiertjes snijden en eventueel met
een hoekpons mooi rond maken (als je die wel hebt).

Ok, now you think....I like this,but I do not have 
the Top Note die. Just cut some straight papers.
You can use a corner punch,if you have one.
Ook hier weer Design papier gebruikt uit de set
Trim the Tree. De rode kant is de voorkant
en daar waar het halve papiertje zit is de binnenkant.
Deit papiertje plak je dus alleen aan drie kanten vast,
zodat je het cadeau kaartje er nog in kan doen.

Here I used some other Trim the Tree  Designers paper.
The red is the front and the half green one is the
inside,that is only glued on three sides,so you
can add the gift card.

Versier de voorkant en maak links boven een gaatje.
Deze keer doe je er een lintje aan en kan je het zo 
in de boom hangen!

Decorate the front and  make a whole on the
top left side. Add a ribbon and you can
 hang this in the tree.

Bedankt weer voor het langs komen
en tot morgen!

Thanks again for stopping by.
See you tomorrow.


onafhankelijk Stampin'Up! demonstratrice


Thursday, December 4, 2014

Dag 4 kerst inspiratie/ Day 4 Christmas inspiration

Vandaag een eenvoudige kaart met papier en stansen.

Today we have a simple card with paper and dies.


Deze keer wil ik laten zien, dat papier wat aan twee kanten
een ander design heeft  voor verrassende kaarten kan zorgen.

This time I want to show you that this two sided paper
makes surprisingly different cards.


Snij paper op maat en plak op de kaart. Bij de ene kaart
gebruik je kant A en bij de ander kaart kant B.
Met de dies heb ik de krans en de strik uitgestanst.
Daarna de krans met dotty embossing folder door
de big shot gehaald. Even met real red inkt
gesponst. Ook de tekst op de stripgestempelt.

Cut paper to size and glue to card.With one card you
use side A and on the other card you use side B.
With the dies I cut the wreath and the bow. The wreath
I also ran through the big shot with a dotty
embossing folder.I sponged some realred ink
on the wreat and stamped the sentiment on the strip.

Bedankt voor het kijken en tot morgen!

Thanks for looking and see you tomorrow!

onafhankelijk Stampin'Up! demonstratrice


Wednesday, December 3, 2014

Dag 3 kerst inspiratie/Day 3 Christmas inspiration

Vandaag maken we simpele kaarten met deze
leuke set die heet: Santa Stache en voor de snor
is er een aparte die. Je vindt de set hier en hier.

Today I made some simple cards with this fun
set called Santa Stache. For the moustache there
is a matching die.You find it here and here.

Voor deze kaart heb je wit en kraft papier nodig.
Ook chocolate chip inkt en een witte gelpen.
Stempel de notenkraker op het kraftpapier
met de chocolate chip inkt, evenals de tekst.
Kleur de haren en ogen met de witte dgelpen.
De snor stempel je nog een keer op wit papier
en snij dan uit met de die. En nu alles plakken 
en je kaart is klaar.

For this one you need white and kraft paper.
Also a chocolate chip inkpad and a white gel pen.
Stamp the image and the sentiment with the
chocolate chip ink and color the eyes and
hairs with the white gel pen.
Stamp the moustache again on a piece of 
white paper and cut out with the die.
Glue everythig together. Card finished!
Deze kaart heeft een laagje extra,maar is net
zo eenvoudig. Voor het kleuren van de kerstmuts
heb ik een blendability marker gebruikt (de lichtste
kleur uit de set cherry cobbler. De kerstman en de
tekst zijn gestempeld met zwarte inkt. De chocolate
chip is gebruikt omde randen van de kaart te sponsen.

This card has an extra layer, but is as easy as the other one.
For coloring the santa hat I used the lightest color from
the cherry cobbler assortment. This time I stamped
the image in black ink, but used the chocolate chip
around the edge of the card.

Bedankt voor je bezoekje en kom morgen
terug voor meer kerst inspiratie.

Thanks for looking and hope to see you
back tomorrow for more Christmas inspiration.


Tuesday, December 2, 2014

Dag 2 kerst inspiratie/ Day: 2 Christmas inspiration

Voor de kaart van vandaag heb je een grote
achtergrond stempel nodig. Ik gebruik hier de 
Dictionary stempel met backed brown suga inkt.
Neem gewoon weer een witte dubbelgvouwen kaart.

For today's card you need a big background stamp.
I used the Dictionary stamp with backed brown sugar inkpad
on a white piece of double folded card.


Op deze achtergrond heb ik de boompjes van de
Festivalof Trees set gestempeld evenals de
tekst die van de set Sassy Salutations.Voor 
wat extra bling nog wat strasteentjes geplakt.

On this background I stamped the trees from the
Festival of Trees set and the sentiment from 
Sassy Salutations. For some extra bling I added
a few gemstones.

Bedankt voor het kijken en tot morgen!

Thanks for looking and come back tomorrow!


Monday, December 1, 2014

Dag 1 Kerst inspiratie/ Day 1: Christmas inspiration


De komende dagen hoop ik jullie te inspieren
met mijn kerstkaarten. Kaarten die je zo klaar
hebt,want de tijd gaat dringen!

In the coming days I hope to inspire you with
my Christmas cards.Cards that you can make
in a short time for Christmasis around the corner.

Deze kaart is gemaakt met een aantal strookjes
papier, die ik nog over had van andere kaarten.
Zonde om weg te gooien toch?!

This card is made with a few strips that I had left
over from other cards,but did not throw away.

Ik ben begonnen met een dubbel gevouwen 
witte kaart en die met het sterren stencil en
rose red inktkussen een mooie achtergrond
gesponst.

I took a white piece of paper and used the
star stencil and rose red ink to decorate the
background of the card.

Dan de strookjes papier op deze
achtergrond plakken.Vervolgens heb ik op een
wit strookje de tekst gestempeld. Deze is van de 
set Festival of Trees. Tot slot heb ik de 
boom uitgeponst en er als finishing touch op-
geplakt met foamtape.

The strips are glued to the background.
On a white strip the sentimentis also stamped
in rose red and is from the set Festival of Trees.
The finihing touch is the punched out tree.

Hopelijk komje morgen weer kijken
wat ik voor kaart heb gemaakt.

Hope to see you again tomorrow
for more inspiration.

onafhankelijk Stampin'Up! demonstratrice


Saturday, November 29, 2014

Sale-A-bration informatie/information


Ieder jaar heeft Stampin'Up! van januari tot maart een
geweldige actie. Bij elke bestelling van 60 euro uit
de verschillende catalogussen mag je een GRATIS extra stempel set
 uitzoeken of papier e.d. uit de speciale SAB catalogus.

Natuurlijk moeten wij demonstratrices hierover voorgelicht
worden. Zo kwam het dat ik gisteravond aanwezig was op een 
bijeenkomst van Stampin'Up! in Nuland.

Every year Stampin'Up! has a fantastic sales action.
When you buy for 60 euro from the catalogue, you
can choose one stampset or papers for free from the special
sale-a-bration catalogue.

Of course us demonstrators needed to be informed
about all of this and we had a big evening in the south
of the Netherlands.
Natuurlijk heb ik er een selfie gemaakt met
het SU! logo op de achtergrond.

Of course I made a selfie with the SU!
logo on the background.

Helaas kan ik jullie nog niets laten zien van de
mooie stempelsets,papier en andere gratis producten,
Maar zodra dat kan laat ik hier alles zien.

Unfortunately I cannot show you all the wonderful
new stamp sets,papers and other products.
But as soon as we can share,i will show you
what is coming.

Wat ik wel met jullie kan delen is de swaps die we hebben gedaan.
Ik heb 30 van deze zakjes gemaakt. 15 Sinterklaasjes en 15 Pietjes.
Hiervoor heb ik de uilen pons en het Nordic Noel design papier
gebruikt en een tekst van Nederlandse stempel set "Juiste Woorden".

What I can share with you is the swap I made for this event. It is 
a little bag with candy for Sinterklaas (this is a Dutch children's
holiday at the 5th of December). I made a tag on it with
Sinterklaas en Peter made with the owl builder and the
Nordic Noel design paper. The sentiment is from a special Dutch
sentiment set from SU!.I made 15 of each.

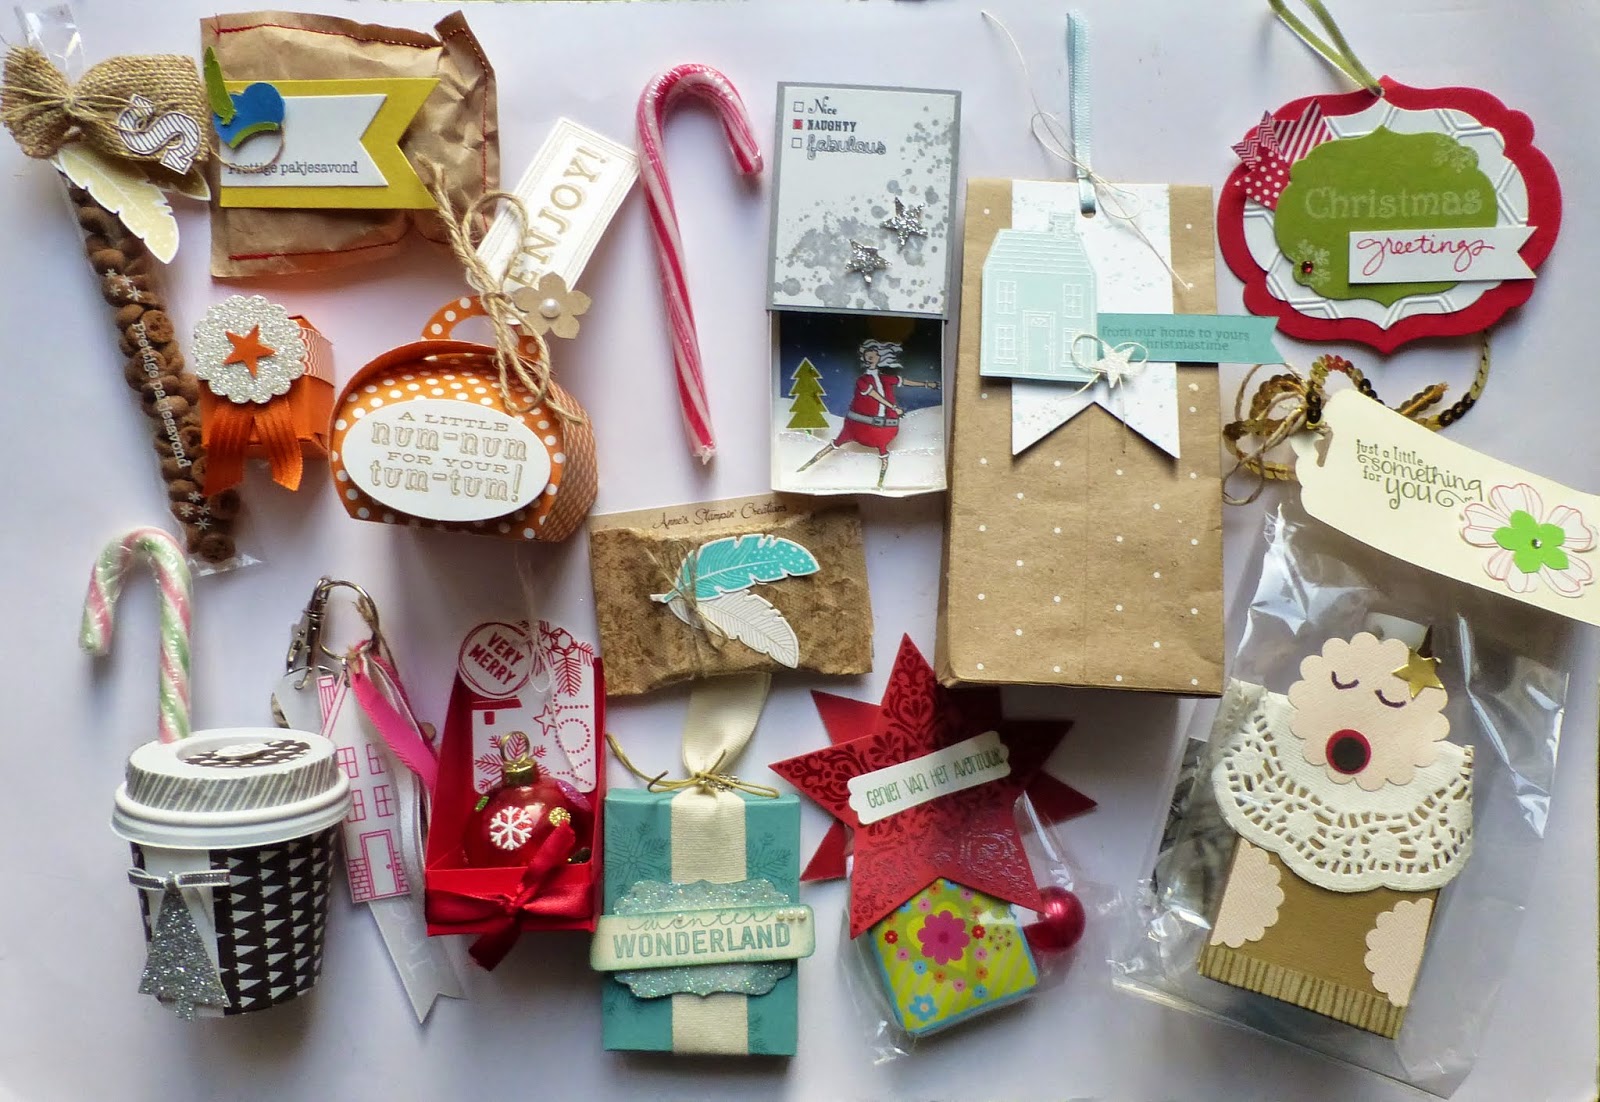
Hier zie je alle leuke en creatieve tags, kaartjes en projecten die ik
heb geruild met andere demonstratrices op deze avond.

Here you see all the fun and inspirational cards,tags and projects
I have swaped with some of the other demo's that were there.

Iedereen hartelijk bedankt voor de geweldige avond!

Thanks to all for the wonderful evening!

onafhankelijk Stamp'Up! demonstratrice